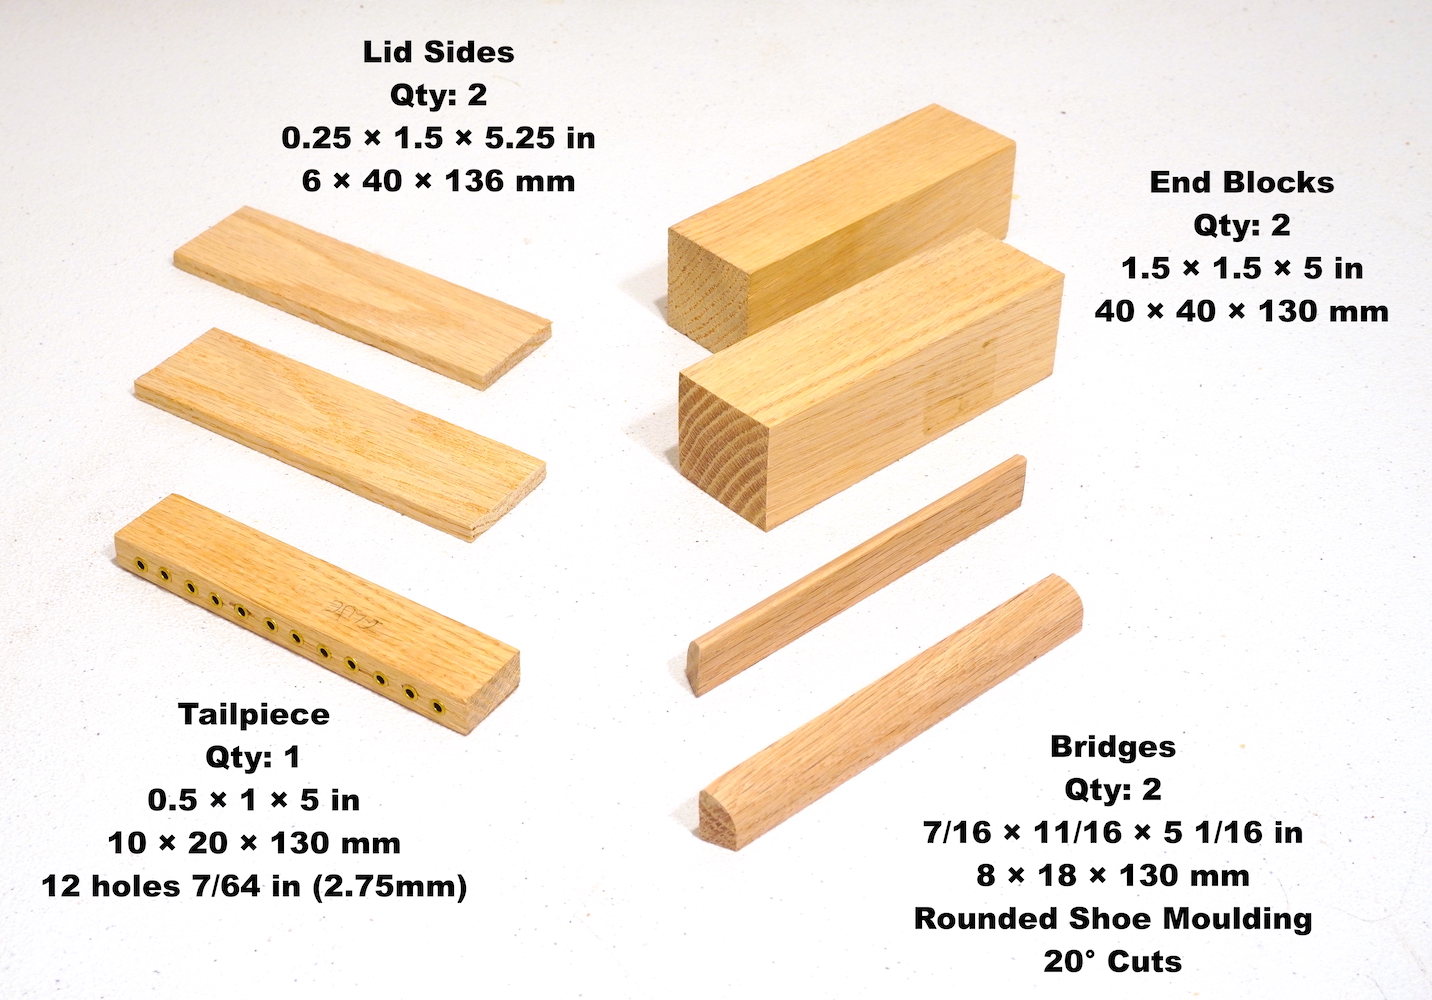
Start by cutting out all of the hardwood parts. The parts and their respective dimensions are shown in Figure 1.
Figure 1: All of the hardwood parts used in the original Aeolian Harp. I now recommend cutting the shoe moulding a little longer so the bridges extend all the way to the edges of the instrument.
After cutting the parts, drill holes in the tailpiece, using the template. If your tuning pegs came with eyelets, hammer them into the holes.
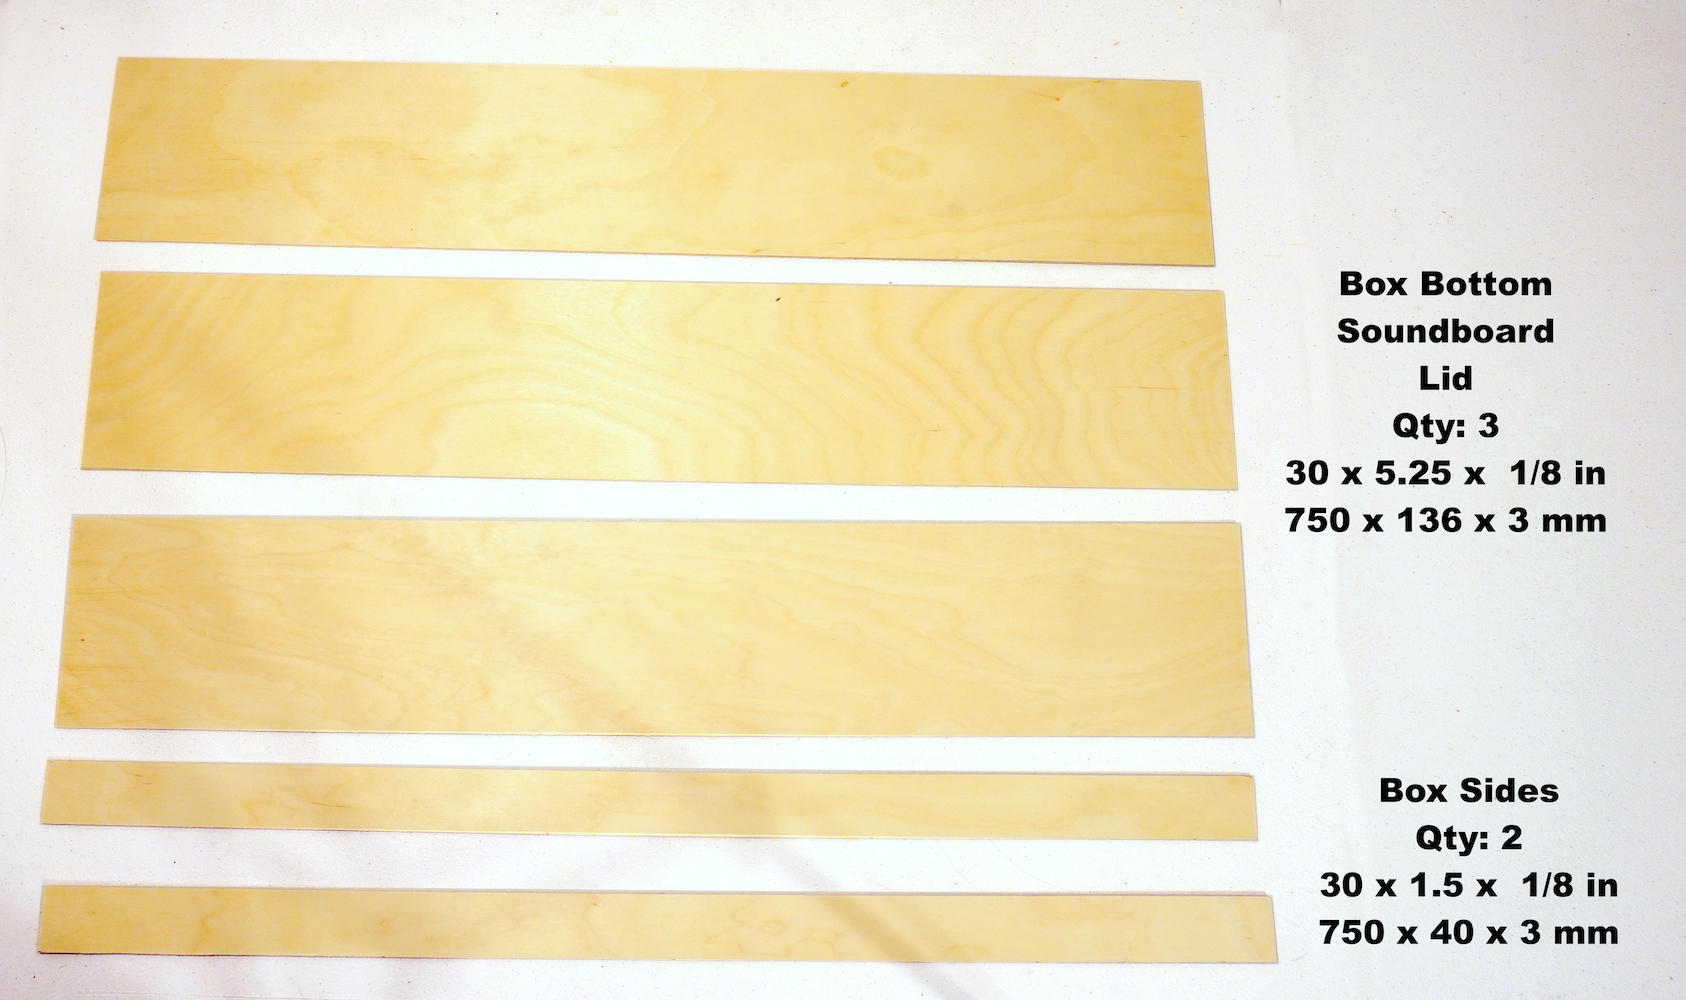
Additionally, cut out all of the plywood parts, as shown in Figure 2. A hole-saw can be used to cut a hole in the soundboard.
Figure 3: All of the plywood parts used in the original Aeolian Harp. I now recommend using 5mm thick plywood for the box bottom and lid, and 1/8 inch (as shown) for the soundboard and sides.
Note that the bracing is not shown in Figures 1 or 2, as this should be cut to length during assembly for the best fit.
Glueup
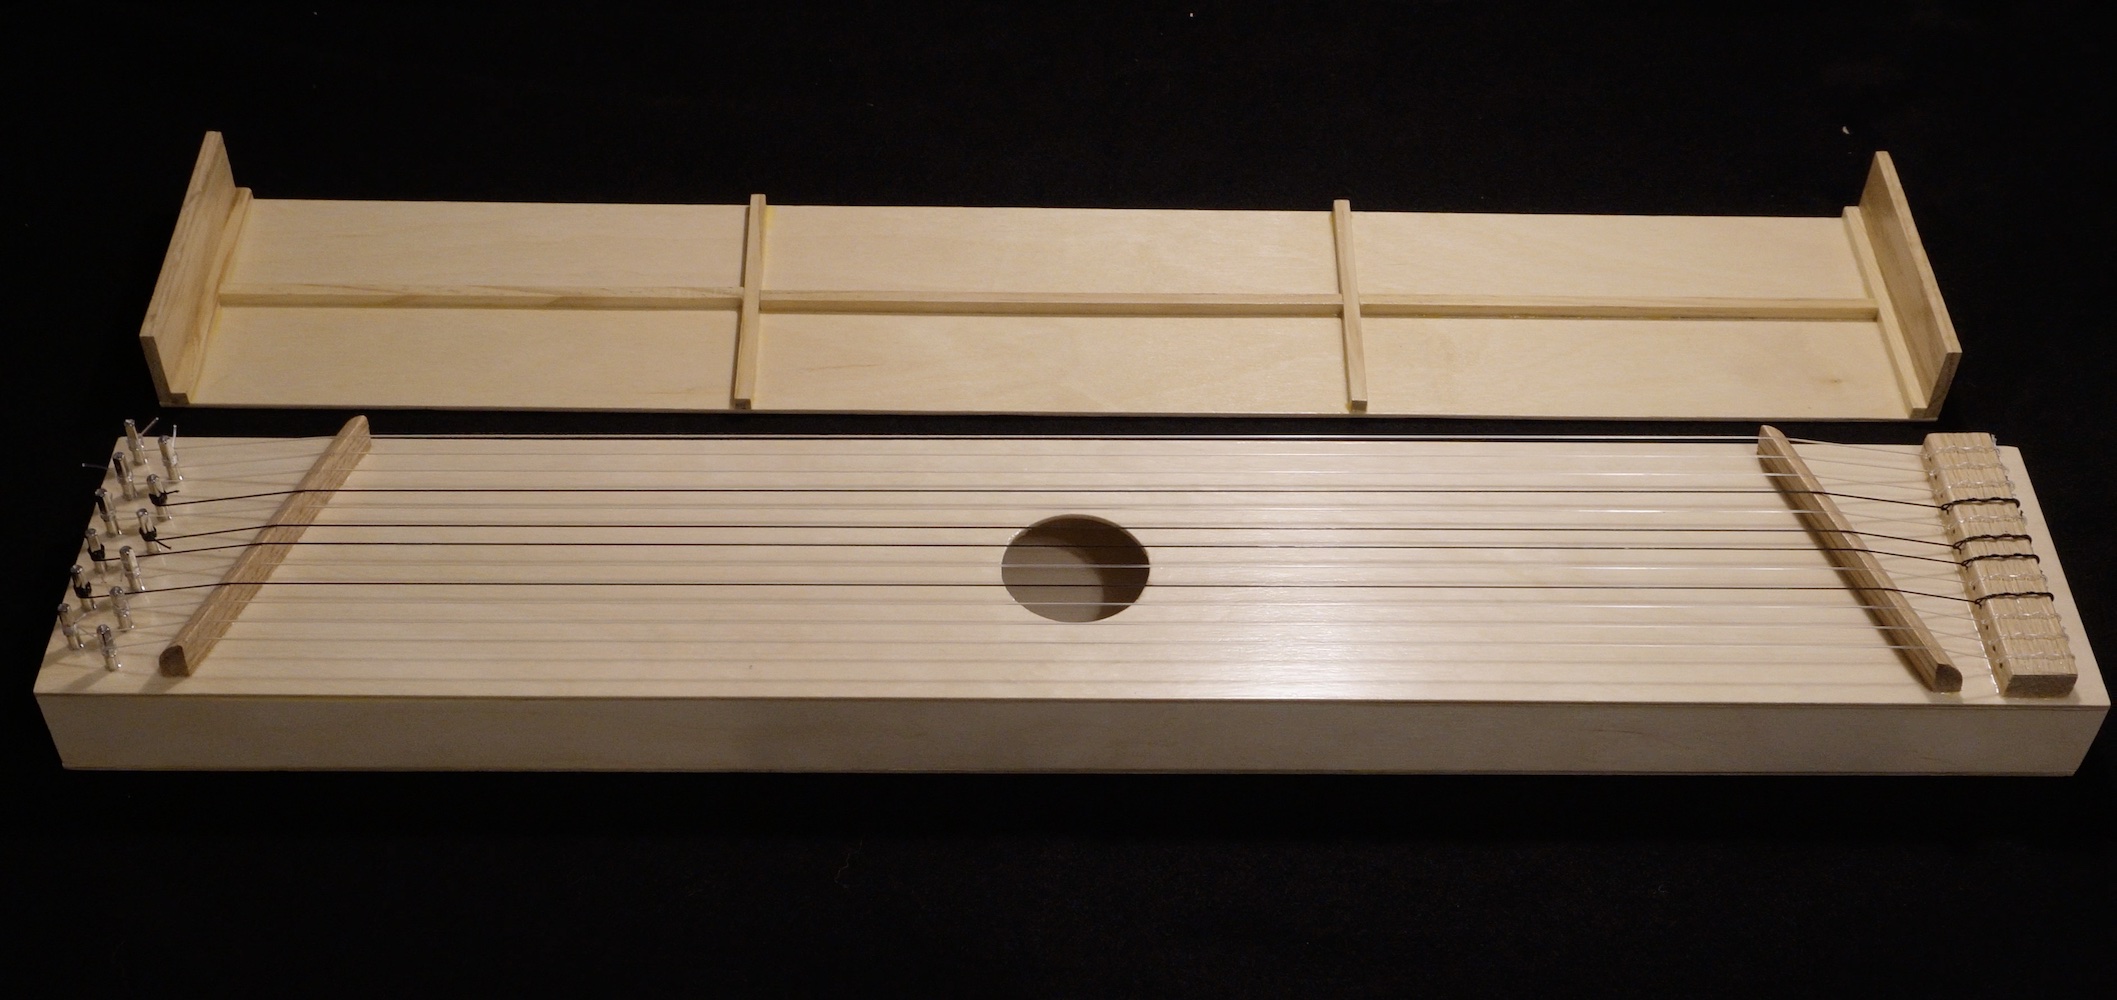
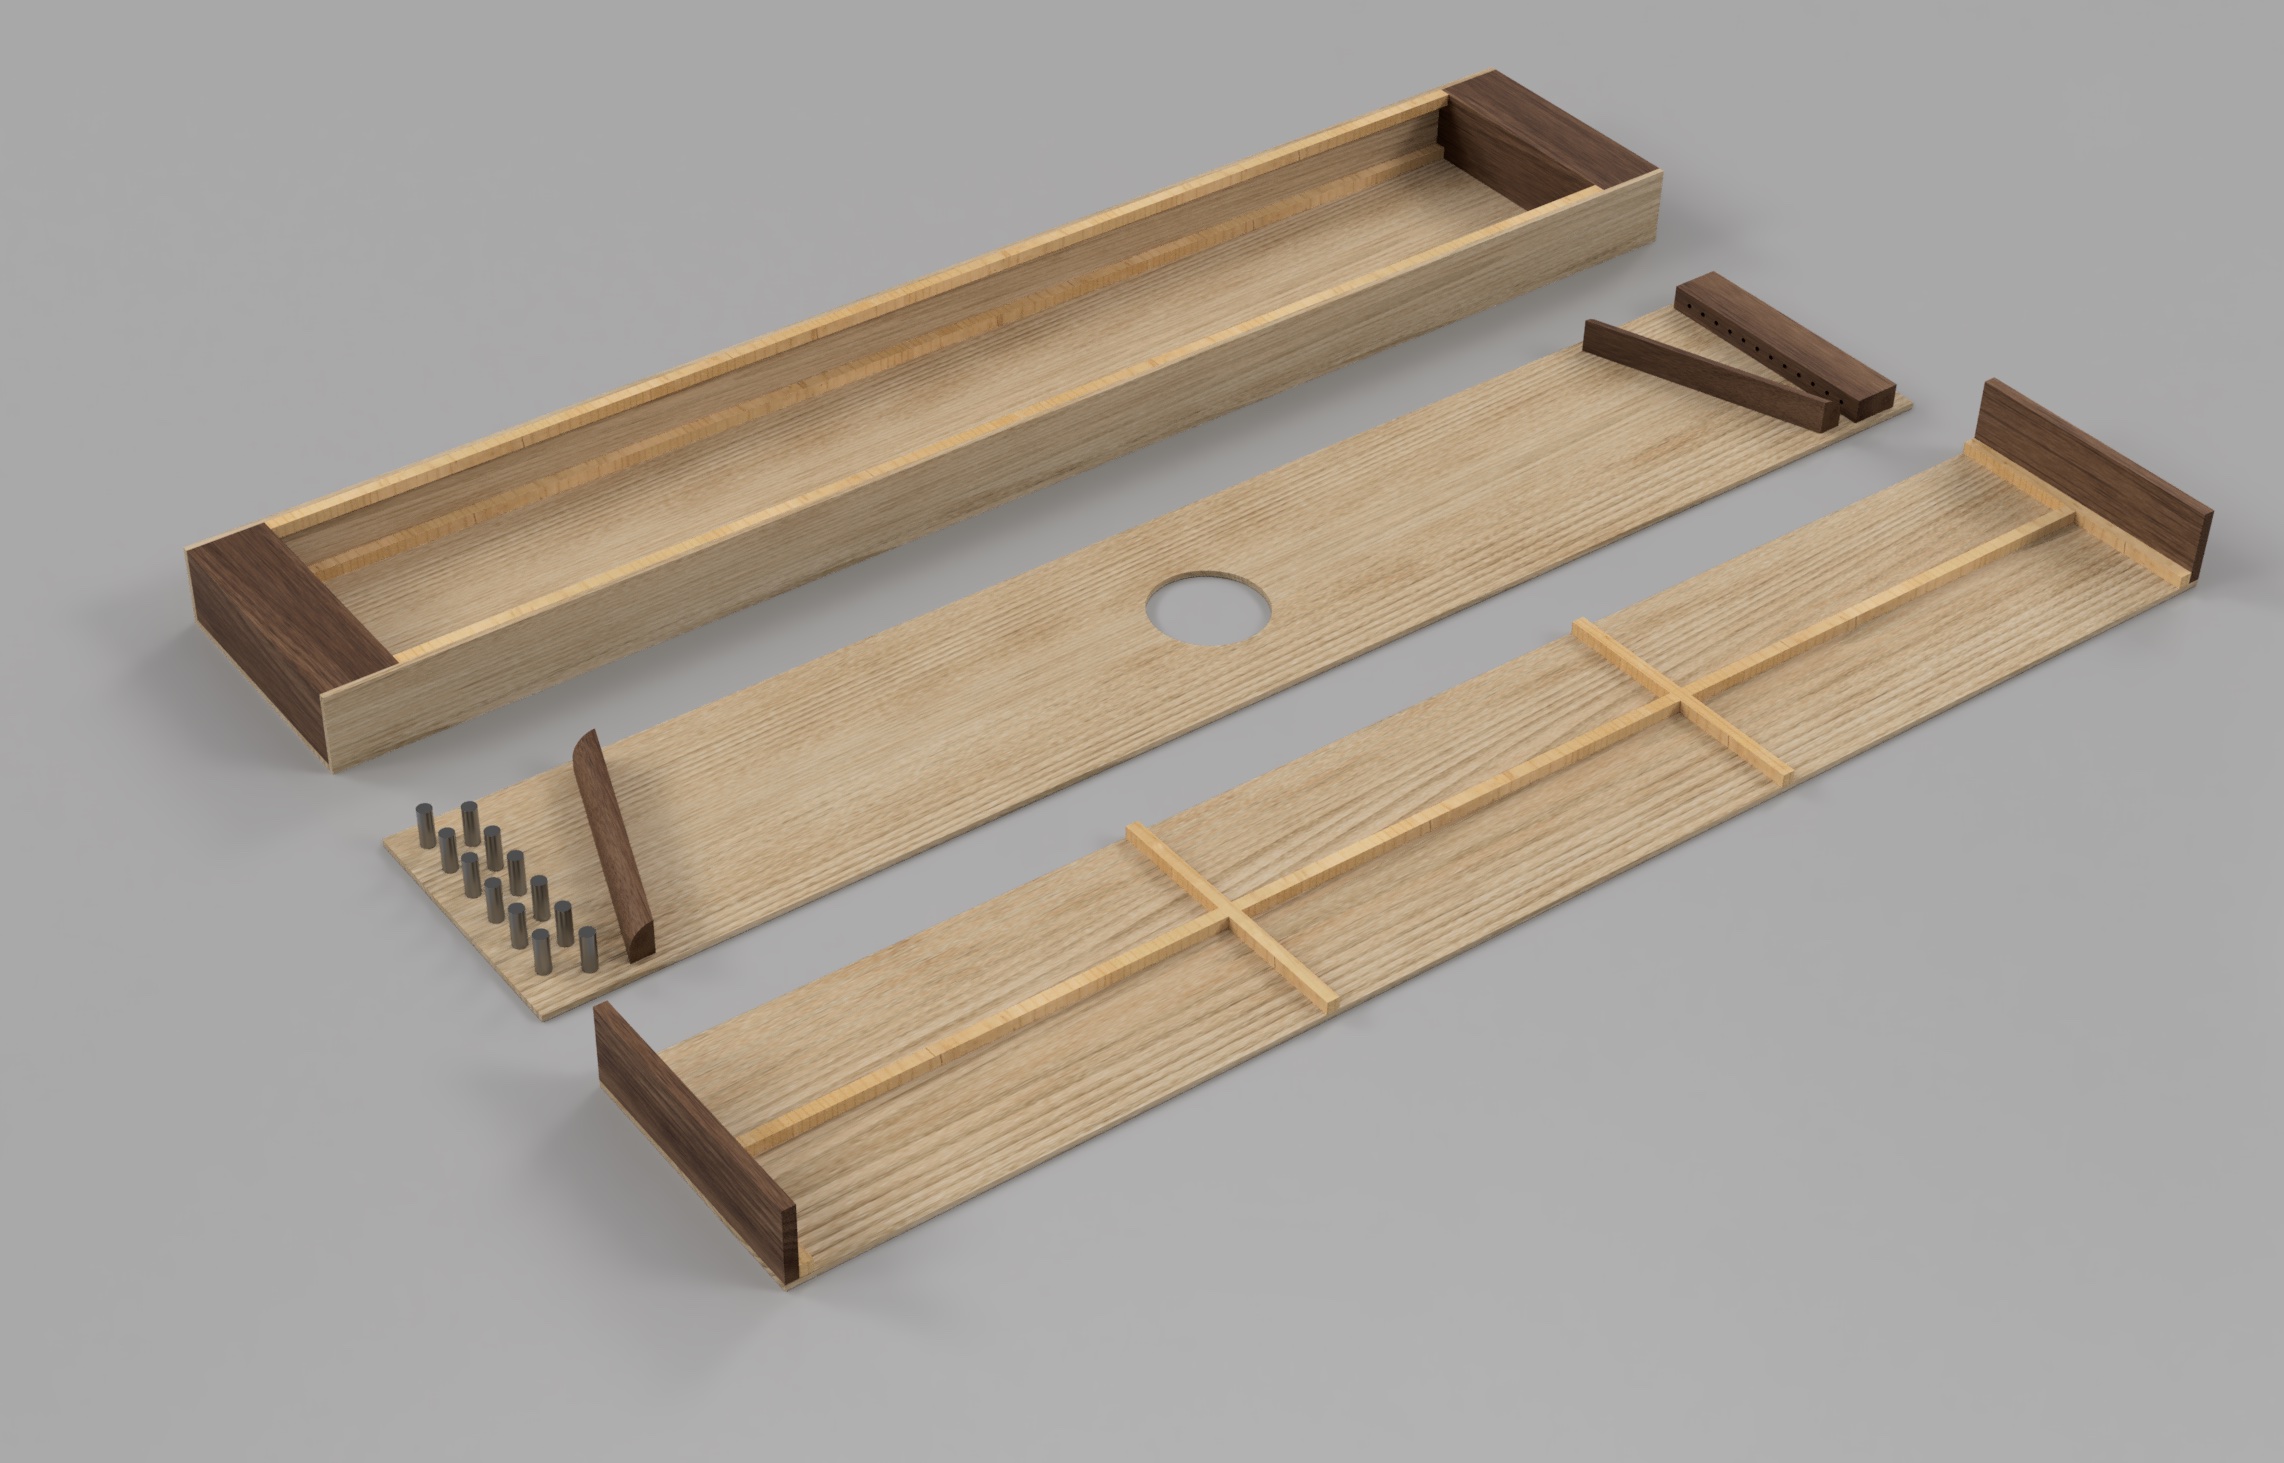
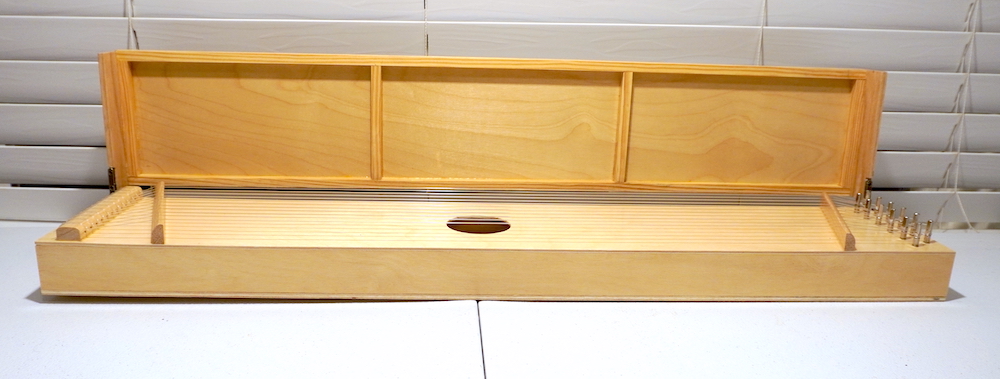
Start by glueing together all of the parts to form the body, top, and lid, as shown in Figure 3. Note that the bridegs are at a 20-degree angle.
Figure 3: The three main pieces of the aeolian harp. They are (from top to bottom) the body, the top, and the lid. I now recommend bracing the lid with a different pattern than shown here, see Figure 8 below. I also recommend extending the bridges all the way to the side of the instrument.
Then glue the top to the body. Use the template to drill holes for the tuning pegs, and screw the pegs into place. Note that in the original design, the lid stays separate and is not glued to the body or top. I now recommend attaching it with hinges as shown in Figure 7 below.
Strings
String the instrument with 6 nylon high-E guitar strings in the longer string positions (where the bridges are farther apart), and 6 nylon B strings in the shorter string positions. Tune them all to around 320 Hz, or half of the resonant freqency of the instrument. Place your instrument in the eye of a hurricane and enjoy.
Now that I have made a few of these I have gotten better at it. Here is what I am doing differently than what I show in the video.
There is more lateral force on the bridges than I expected from the strings trying to knock them over. The bridges came unglued from the first one I made, mostly because I polyurethaned the soundboard prior to glueing them on. Don't do that. Glueing them properly is probably sufficient, but I have also been drilling up into them through the soundboard with a 1/8-inch bit and glueing in dowel pieces made from bamboo skewer that I bought at the grocery store. I added the skewer locations to the template. I have also been putting a couple of dowles up into the bridge, being careful that they go between the string holes.
The bridges were a bit too tall. The strings did not wind properly around some of the tuning pegs as a result. Sanding 1 or 2 mm off of the top is sufficient to fix this.
The bridges were not long enough. I didn't account for the fact that the string comes from the side of the tuning peg, not the center, so the one string was almost falling off of the bridge. I have now been making the bridges extend to the edges of the instrument, and I updated the template to reflect this.
The body was not quite strong enough. It warped / twisted slightly when I tightened the strings, more so on one with steel strings. I have since been using 5mm plywood for the bottom of the body, with 3/8-inch bracing along the bottom. I'm still using 1/8-inch plywood for the soundboard and sides, and 1/4-inch bracing around the soundboard. This is much better.
Similarly, the lid was somewhat more flimsy and flexible than I expected and it sagged under its own weight. I have subsequently been using 5mm thick plywood for the lid, and 3/8-inch bracing. I've been putting the bracing in a different pattern than in the video, and there is a photo of it below.
In the video, the sides of the lid are held on by glue alone. So far this has not been an issue, but they are supposed to support the weight of a window. Therefore I have now been using bamboo skewers to anchor them to both the bracing and the lid. A photo of this is below.
The lid being separate from the body was stupid. I'm now attaching them together with hinges. I put a link to the hinges in the materials section above, and there is an image below. The hinges require you to cut recesses into the soundboard and lid sides, and I have not yet perfected this. The proper hole size is 1/16 inch for the screws provided with the hinges.
At some point I started to worry about spiders living inside the instrument. Subesquently I have been polyurethaning the inside of the body prior to glueing on the sound board. Be careful not to polyurethane the glue surfaces.
In the video I got a lot of tearout around the soundhole and tuning peg holes when I drilled them. For the soundhole, I have been turning the hole saw by hand and with very, very light pressure until it cuts through the top veneer. Then I finish it with the drill but as slow and light as possible. This gives very good results. For the tuning pegs, I put masking tape over the entire area before marking and drilling, and this completely solved it. Image below.
After keeping one in my window for several months, it does sing very quietly for a few seconds every now and then in imperceptably weak airflow. The issue is that even if the wind is blowing very strong outside, if you only have one window open, wind is not going to blow through it since the pressure is equal. Thus imperceptably weak airflow is all I ever get. So for best results you probably need a second window open on the other side of your house. I'll experiment with this more once the weather is warm again.
The instrument is a bit quiet. Possible solutions are a) use thin pinewood instead of plywood for the soundboard; b) use a thin and hard bridge like a guitar; c) make the body larger; and d) make the soundhole larger. I'm not sure which of these would have the most impact.
I never did get the 6 B strings up to pitch without breaking them. It is probably better to use 12 strings of the same diameter if you want them all the same pitch. You can also get light, normal, and heavy tension versions of strings of the same pitch.
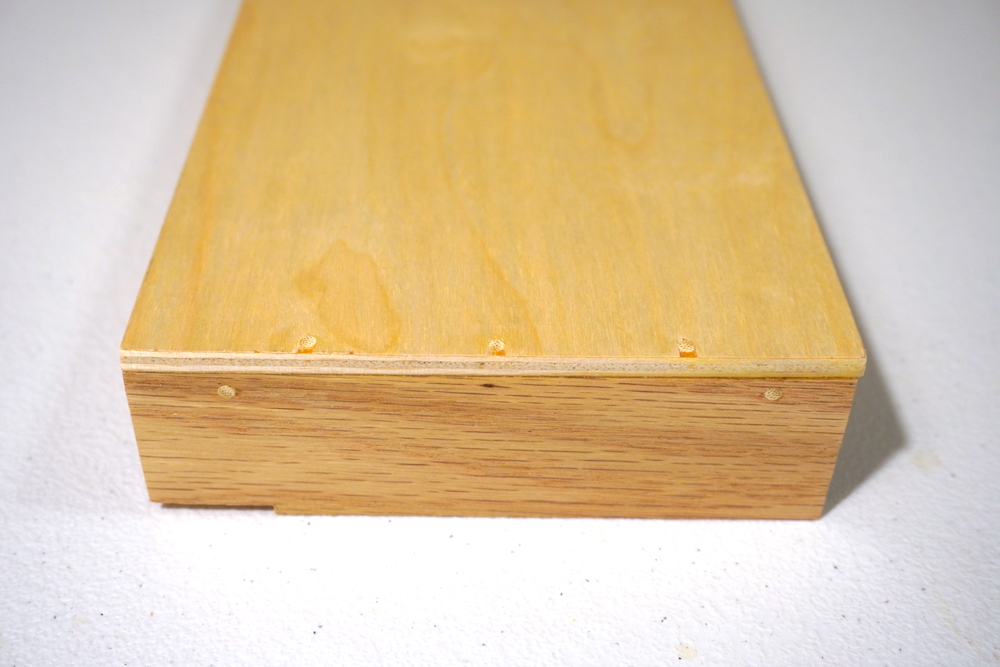
Figure 4: Detail of the improved lid showing bamboo dowels securing the sides. The three on top go through the plywood into the oak sides. The two in front go through the oak sides into the bracing behind. Note a small notch has been cut out of the lower left corner, this is for the hinge.
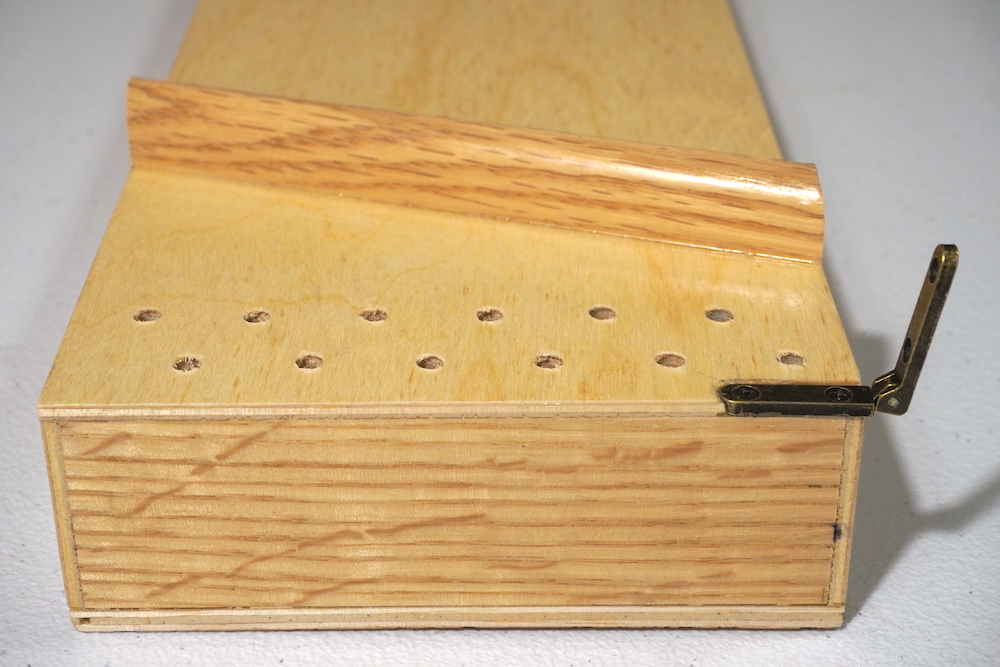
Figure 5: Detail of the improved body prior to assembly showing a) the bridge is the same width as the instrument; b) the tuning peg holes are not chipped out because they were drilled with masking tape over the whole area; c) there is a hinge which has been recessed into the soundboard; and d) the body bottom is 5mm plywood while the sides and soundboard are 1/8 inch.
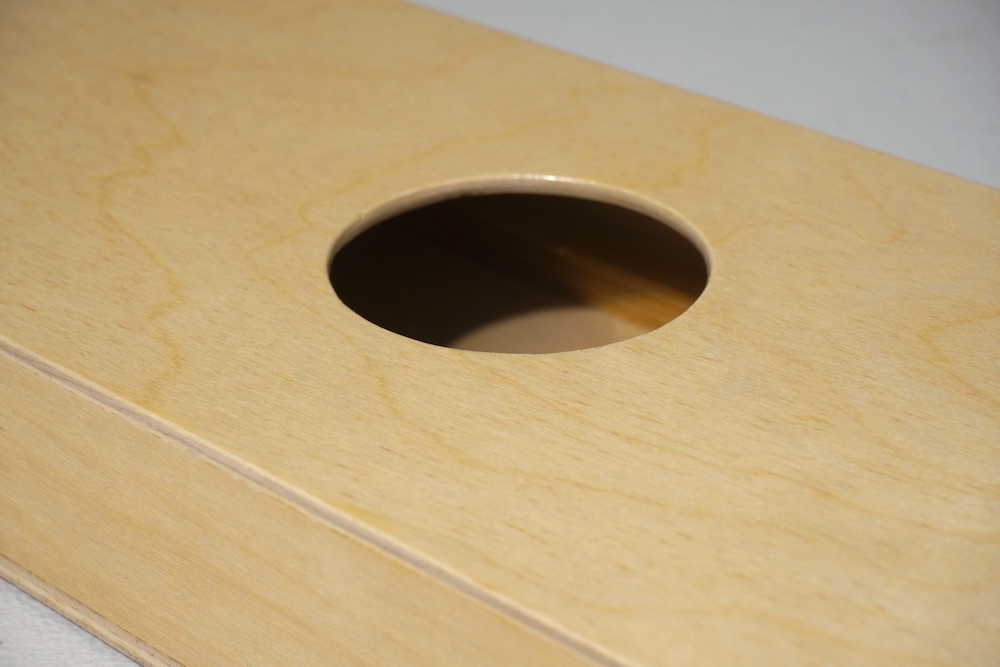
Figure 6: Detail of the improved body showing the sound hole has not been chipped out due to slower and more careful drilling technique. A piece of 3/8 inch bracing can be seen through the sound hole. Not seen is a piece 1/4 inch bracing above it supporting the soundboard.
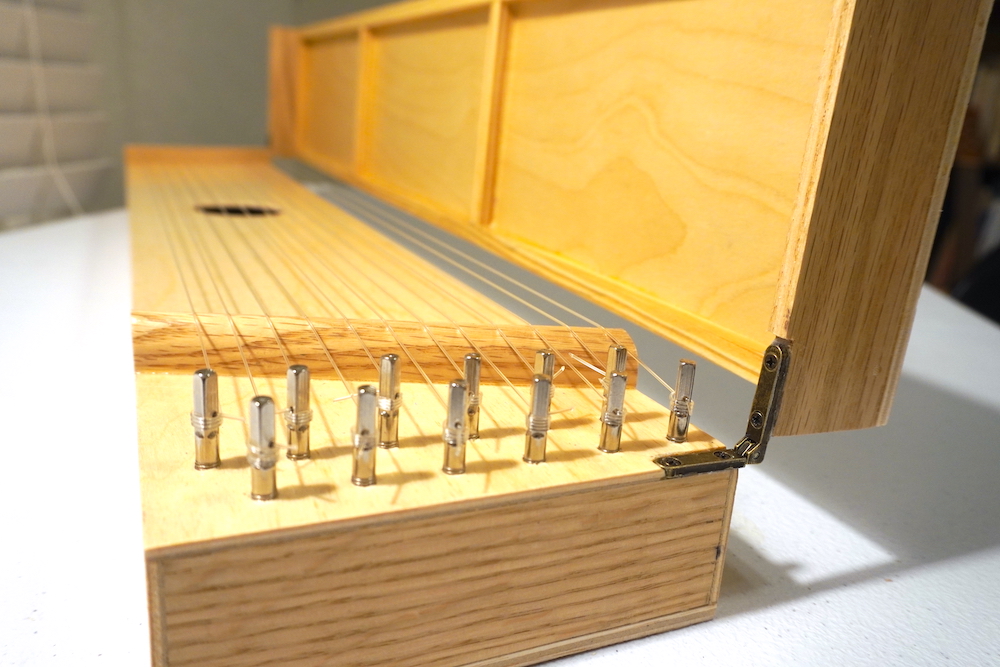
Figure 7: Detail of the improved instrument after assembly showing one of the lid hinges, there is an identical one on the other side.
Figure 8: Detail of the improved 3/8 inch lid bracing. Two pieces run lengthwise from one hardwood piece to the other. Four shorter pieces run widthwise between the longer pieces. two of them are touching and providing support to the hardwood pieces, and the other two are are evenly spaced between. The top of the lid is made of 5mm thick plywood.